ESP32-2432S028 · Open source · MIT

Your desk,
always informed

A compact touchscreen dashboard for your desk. Live weather, Home Assistant sensors, habit tracking, focus timer, and a browser-based configurator. Runs on a $10 ESP32 display.

6Screen pages
11Home widgets
~$10Hardware cost
MITLicense
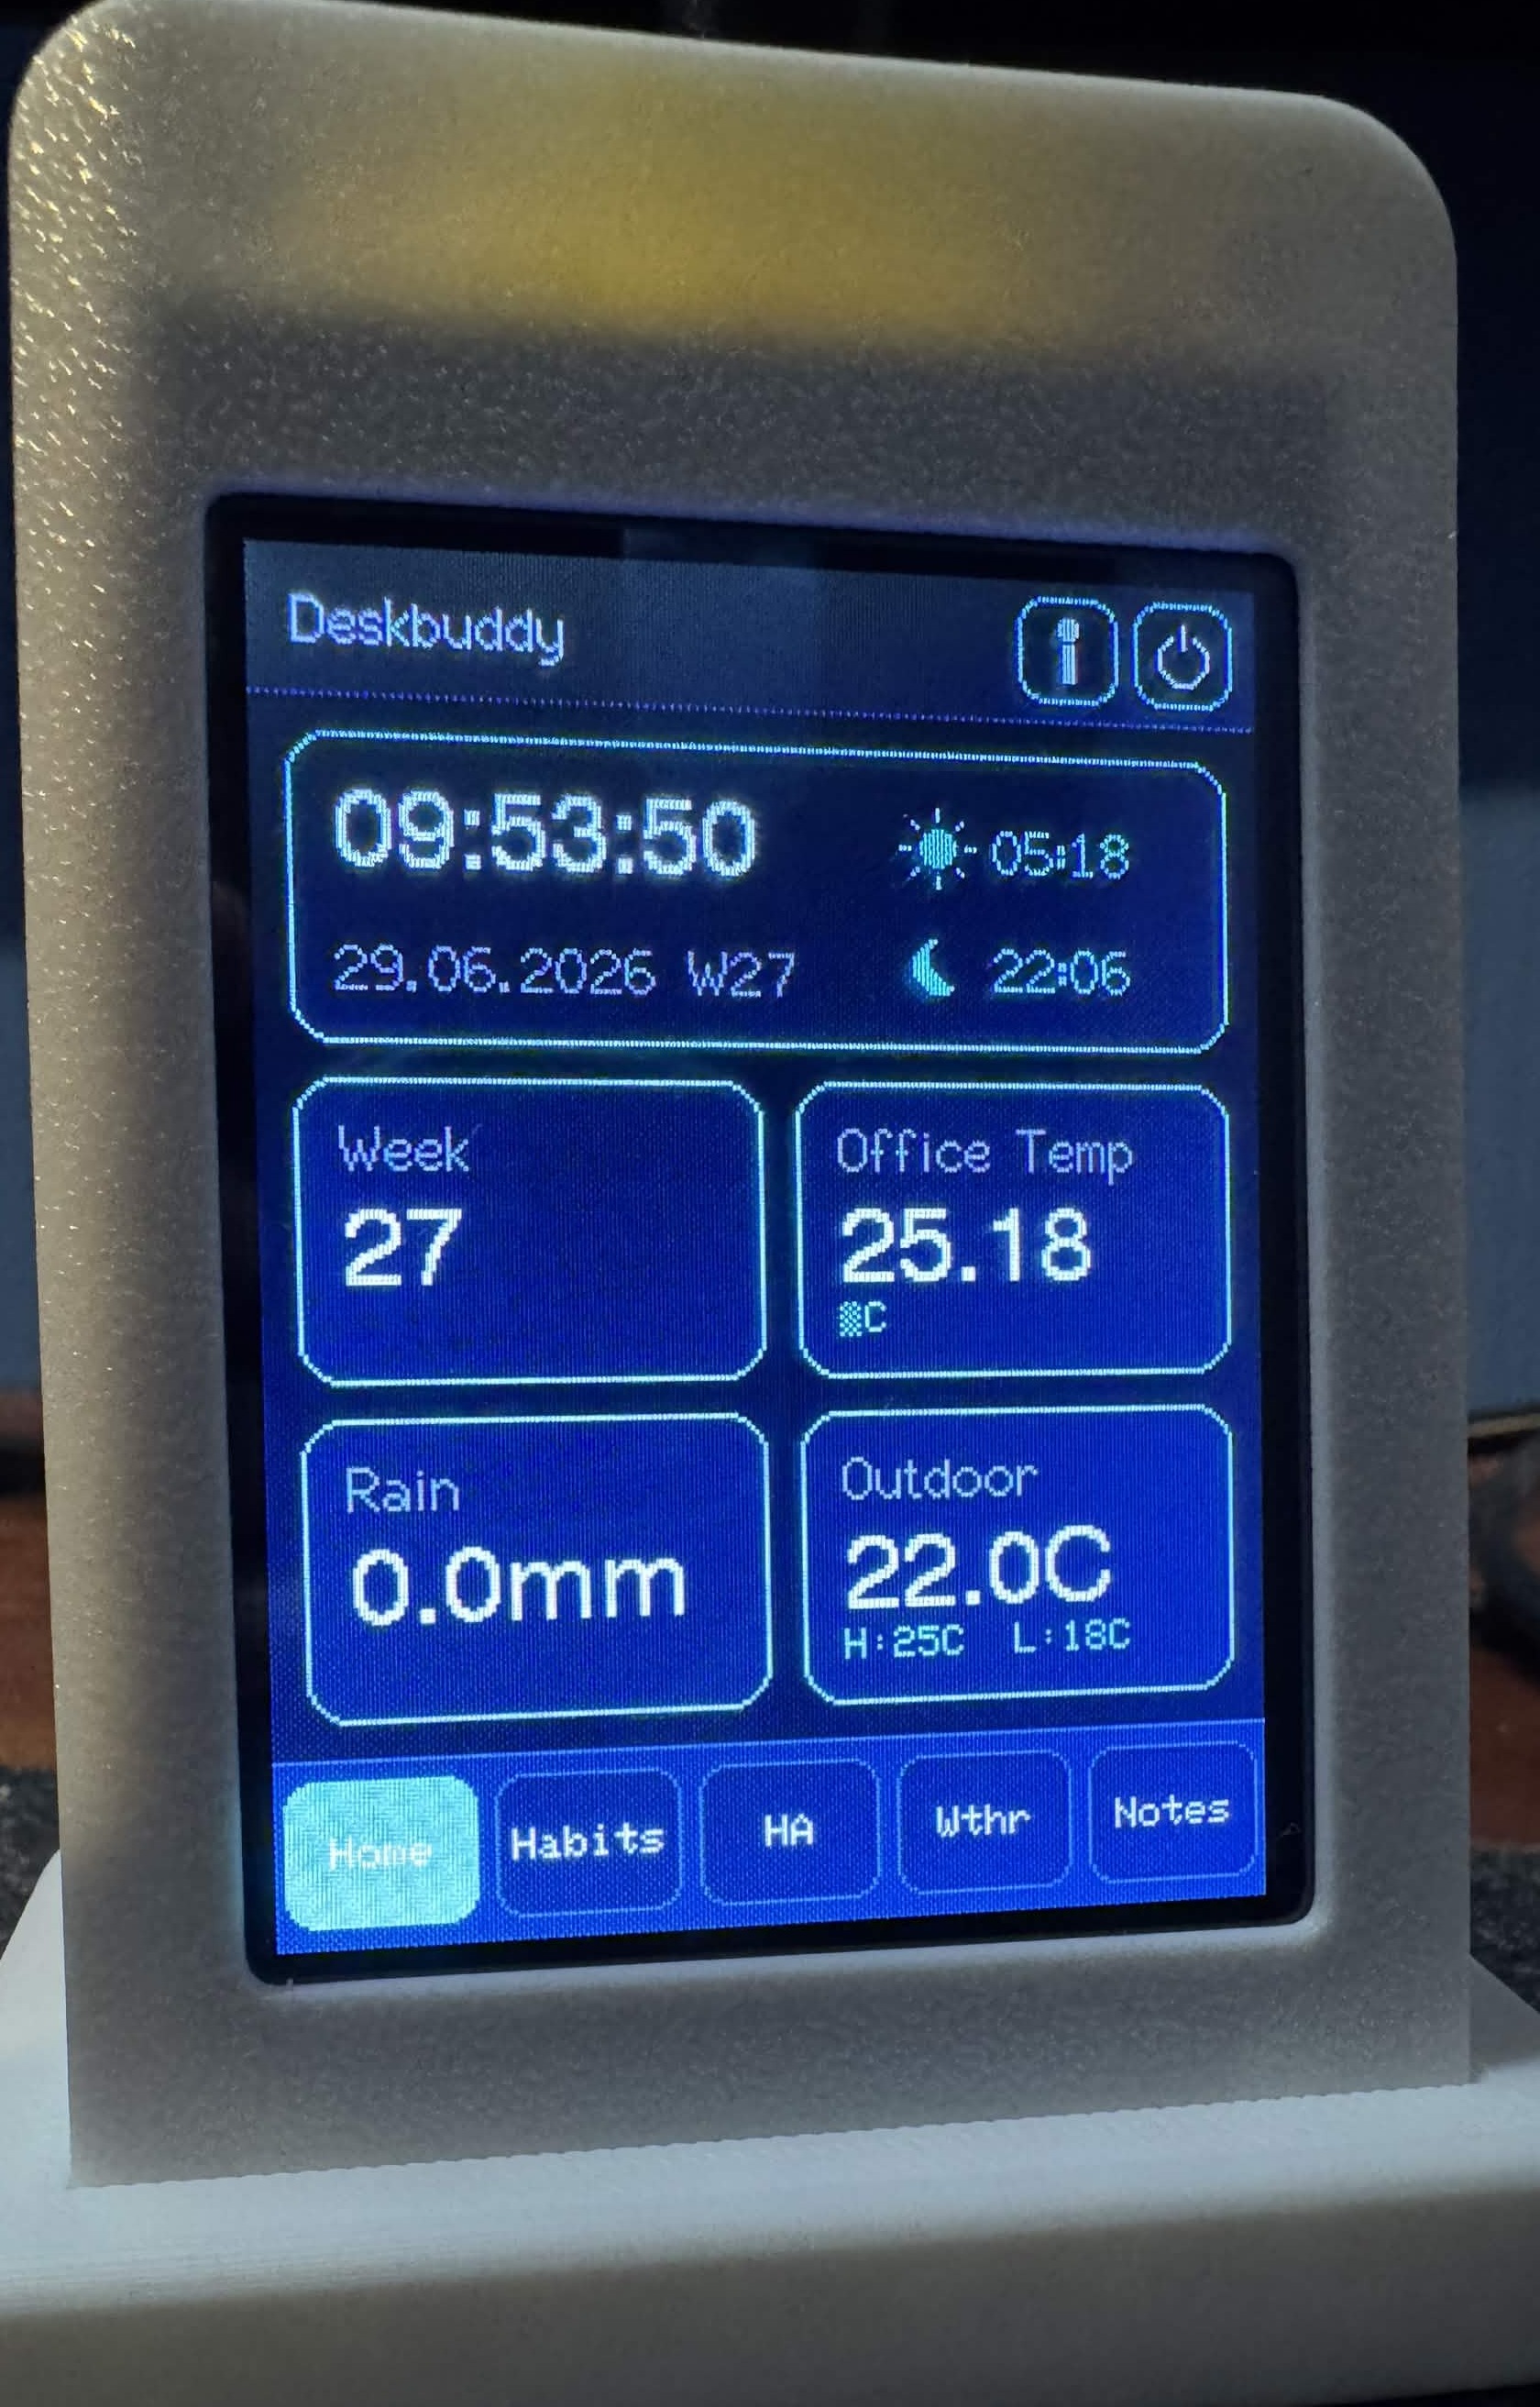
DeskBuddy on a desk in a 3D printed stand
🌐
No cloud, no subscriptions
Weather from Open-Meteo. Home Assistant over LAN. Time from NTP. Everything runs on your local network. No accounts, no API keys.
Configure without reflashing
Open the device IP in any browser to change themes, widget layout, HA sensors, timer presets, and more. Changes apply instantly. After the first flash, OTA means no more USB cables.
🔧
Built to extend
Clean widget system, REST API, and a Python configurator to build and flash from a browser. A solid base to build your own features on top of.
What's included

Everything built in

Everything here ships in the firmware. No extra installs, no accounts needed. Coming-soon features are on the roadmap.

Always included: base firmware
🕐
Clock & NTP
Time, date, sunrise/sunset
🌤
Weather
Open-Meteo, no API key
Focus timer
6 configurable presets
📝
Notes page
Synced from web UI or API
📶
Status page
WiFi, uptime, IP (tap ⓘ)
🎨
Theme system
12 accents, 10 backgrounds
🧩
Widget layout
Drag & drop in web UI
See it in action

Browser configurator & Device UI

The Python configurator runs locally and handles everything from compiling to OTA flashing. The Device UI lives on the device itself and needs no software at all.

localhost:5000 · Features
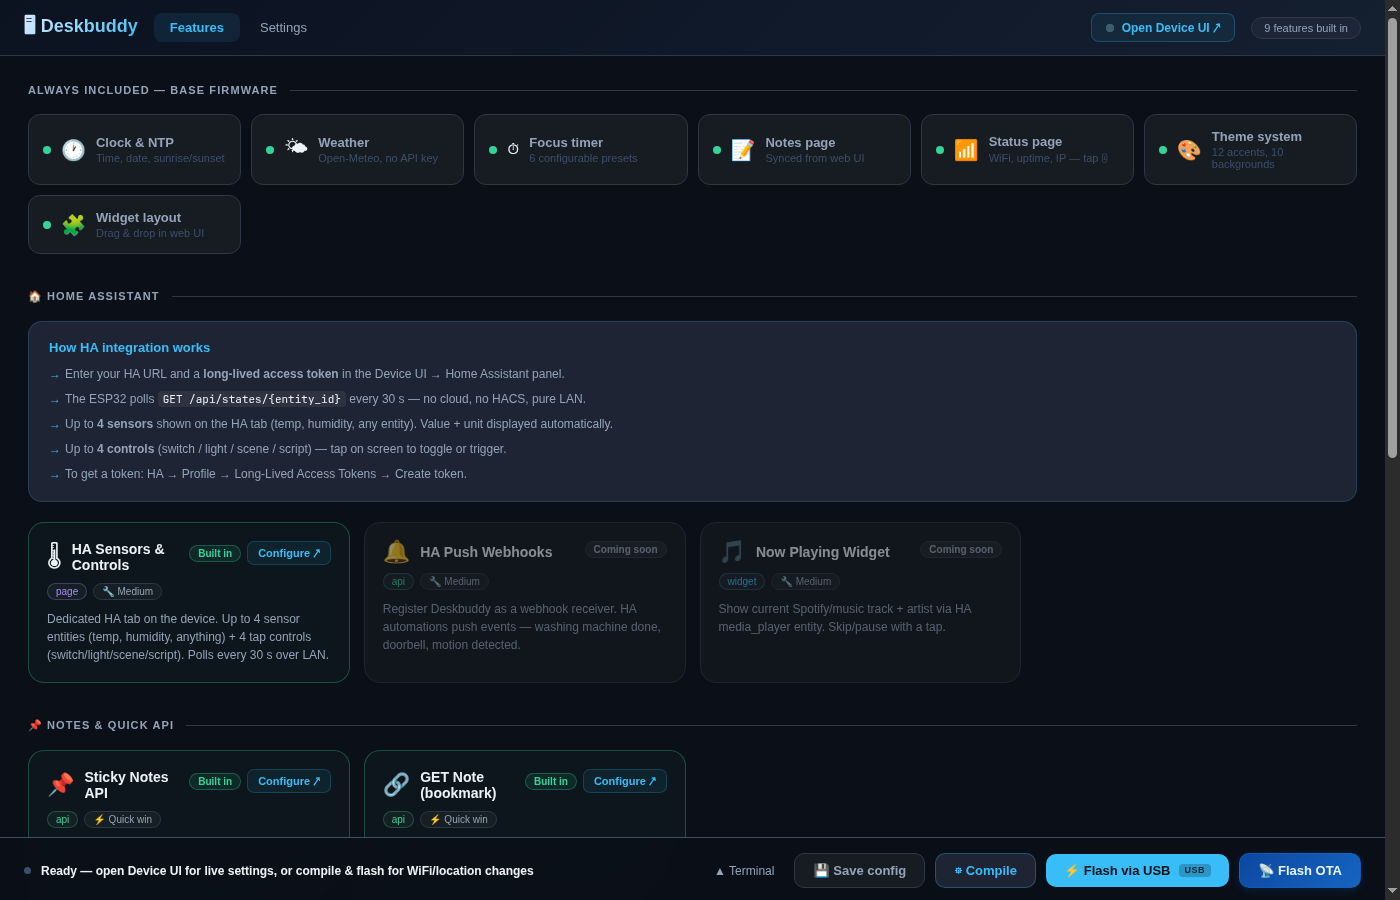
Configurator features tab showing module cards
Configurator: feature overview with links to device UI
localhost:5000 · Settings
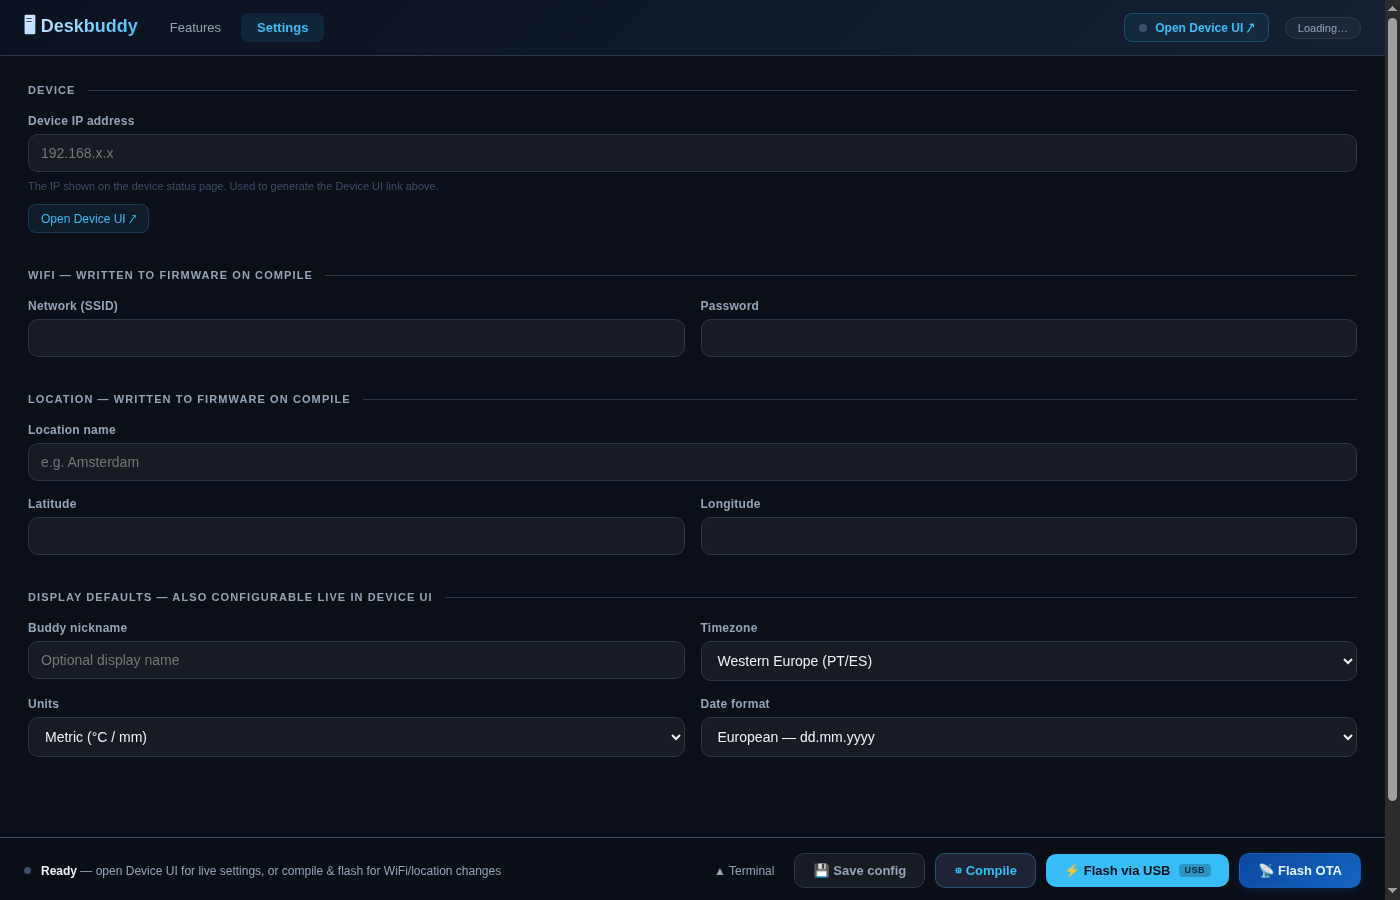
Configurator settings tab with build bar
Configurator: WiFi, location, compile and flash in one place
192.168.x.x · Widgets
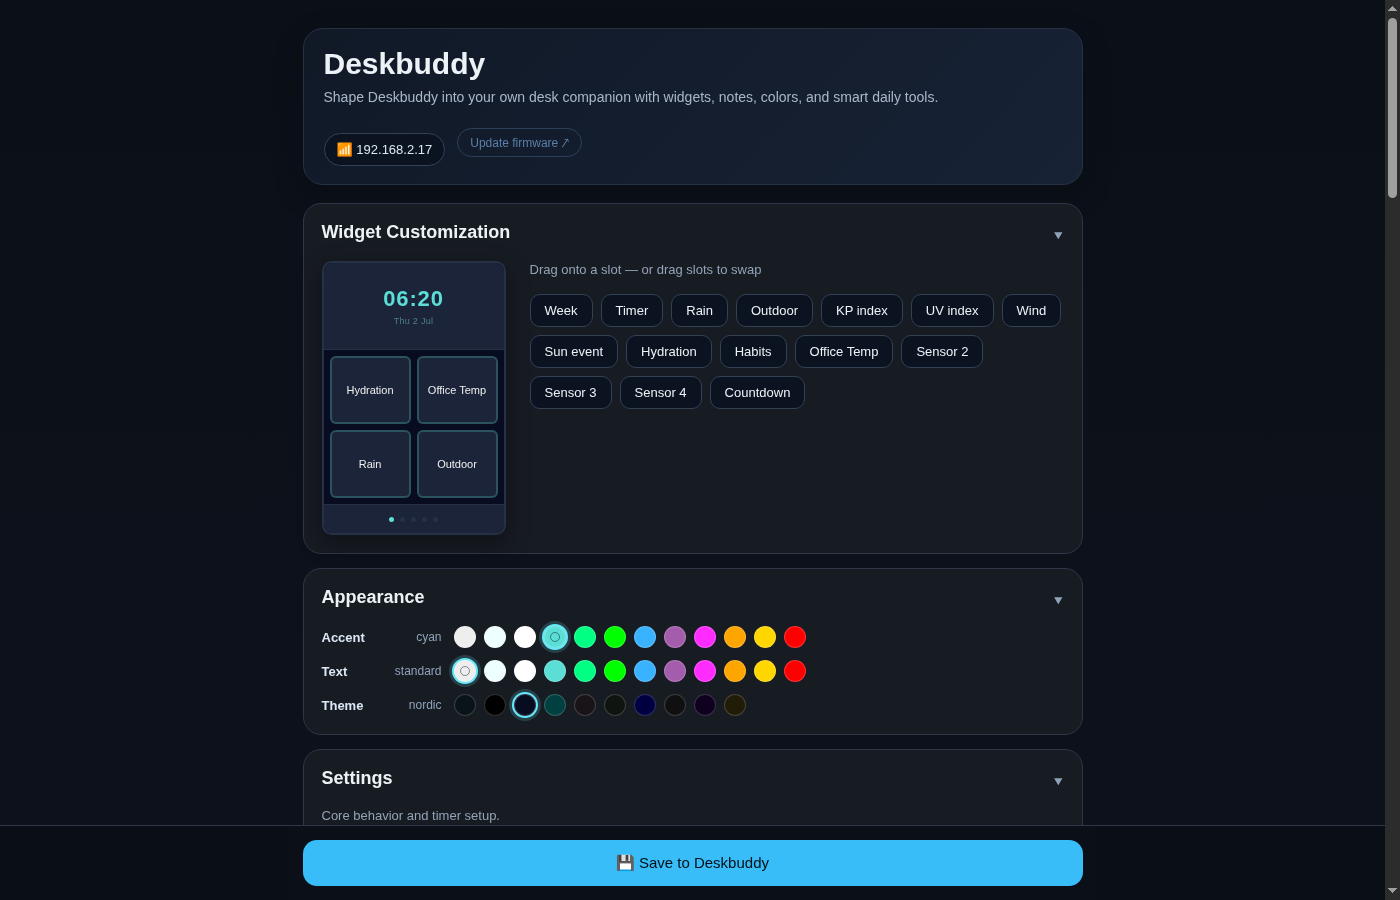
Device UI widget layout and appearance
Device UI: widget layout (drag and drop) and live theme preview
Setup guide

Up and running in 15 minutes

You'll need a soldering iron for exactly nothing. Plug in the display, flash the firmware, done.

Hardware you need
PartNotesLink
ESP32-2432S028 ("Cheap Yellow Display")2.8" 320×240 resistive touchscreen, ~$10AliExpress ↗
USB-C or Micro-USB cableFor initial flash only
3D printed stand (optional)Designed to fit the CYD snuglyMakerWorld ↗
1
Clone the repo and install PlatformIO
PlatformIO handles all library dependencies automatically. No manual installs.
# Clone
git clone https://github.com/RolfKoenders/Deskbuddy.git
cd Deskbuddy

# Install PlatformIO CLI (skip if already installed)
pip install platformio
2
Create your secrets file
This file holds your WiFi credentials and location. It's gitignored and never committed. Use the Configure section below to generate and download it automatically.
# Copy the example file
cp include/secrets.h.example include/secrets.h

include/secrets.h

  • WIFI_SSID / WIFI_PASS: your network credentials
  • DEFAULT_LAT / DEFAULT_LNG: decimal coordinates for weather (e.g. 52.3676f, 4.9041f)
  • DEFAULT_LOCATION: city name shown on the device
3
Flash over USB
Plug in the CYD, then run one command. PlatformIO picks the right port automatically on most systems.
pio run --target upload
Or launch the full local configurator for a browser-based build, flash and OTA interface:
python configurator.py
4
Find the IP and open Device UI
After boot the device shows its IP on the status page (tap the ⓘ icon). Open it in any browser on your network. All further configuration happens there, no USB cable needed.

Flashing options

  • USB: only needed for the initial flash or after changing secrets.h
  • OTA: push firmware wirelessly from python configurator.py or curl -X POST http://<ip>/update -F firmware=@firmware.bin
No reflash required

Everything configurable live

Open http://<device-ip> in any browser on your network. Changes apply instantly and the device keeps running.

🧩
Widget layout
Drag and drop which 4 widgets appear on the home screen. Options include weather, UV, wind, hydration, habits summary, HA sensors, and more.
🎨
Theme & appearance
10 background palettes, 12 accent colors, 3 text styles. Live preview updates as you pick so you can see exactly what the screen will look like before saving.
🏠
Home Assistant
Set your HA URL, long-lived token, and up to 4 sensor + 4 control entity IDs. The device polls every 30 s over LAN.
Habits & hydration
Name up to 6 daily habits and set your water intake goal. Tap to mark done on the device; streaks tracked across days.
Focus timer presets
6 customisable timer presets (25 min, 45 min, etc.) plus full Pomodoro mode with configurable work / break / long-break durations.
🌙
Sleep & auto-dim
Set idle timeout for dim mode and sleep mode separately. Touch anywhere to wake. Useful for keeping the display healthy overnight.
🌍
Location, timezone, units
Change city name, coordinates, timezone (with DST), metric/imperial units, and date format. None of it needs a reflash.
🕰
Context clock & reminders
Second timezone on the clock card for remote teams. Eye break (20-20-20) and movement reminder overlays with configurable intervals.
192.168.x.x
Device web UI
REST API

Push notes from anywhere

Every DeskBuddy exposes a small REST API on your local network. Send notes from Home Assistant automations, shell scripts, browser bookmarks, or anything that can make an HTTP request.

POST /api/note Send a note to the display
# Push a sticky note
curl -X POST http://<device-ip>/api/note \
  -H "Content-Type: application/json" \
  -d '{"text": "Remember to water the plant"}'

# One-liner via GET (save as a browser bookmark)
curl "http://<device-ip>/note?msg=Stand+up+and+stretch"
GET /api/note Read the current note
curl http://<device-ip>/api/note
→ {"text": "Remember to water the plant"}
POST /api/note/clear Clear the note
curl -X POST http://<device-ip>/api/note/clear
GET /api/status Device status JSON
curl http://<device-ip>/api/status
→ {"uptime":3721,"ip":"192.168.1.42","wifi":"Online","habits_done":3,"habits_total":6,"hydration":5}
POST /update OTA firmware update
# Flash new firmware wirelessly (multipart form)
curl -X POST http://<device-ip>/update \
  -F "firmware=@.pio/build/esp32dev/firmware.bin"
→ OK. Rebooting...

Home Assistant example

  • Add a rest_command in HA config, then call it from automations, for example to push "Washing done" when the washing machine finishes.
  • Use the /api/hydration/reset endpoint with a morning HA automation to reset your water count at a custom time.
  • Pair /note?msg= with a browser bookmark for instant one-click notes from any device on your network.
Quick setup

Generate your secrets.h

Fill in your details below. Config saves to your browser automatically. Download the generated file and drop it into include/secrets.h, then run pio run --target upload.

Your configuration
1
Fill in WiFi & location
Enter your network credentials and city coordinates. Your browser saves this automatically. Nothing gets sent anywhere.
2
Download secrets.h
Click the button. Place the downloaded file at include/secrets.h inside your cloned repo.
3
Flash via USB
Run pio run --target upload or open python configurator.py for the full local browser interface.
4
All future changes via browser
Open the device IP in your browser. Theme, widgets, HA sensors, timers: all configurable live. OTA keeps you up to date without USB.